Project Zomboid map mods usually need three values from the Workshop page: Workshop ID, Mod ID, and Map Folder. The map folder is added to the Map= line in servertest.ini.

  1. Back up the server before changing map or mod settings.
  2. Open the Steam Workshop page for the map mod.
  3. Copy the Workshop ID, Mod ID, and Map Folder listed by the mod author.
  4. Open Configuration Files, then edit servertest.ini.
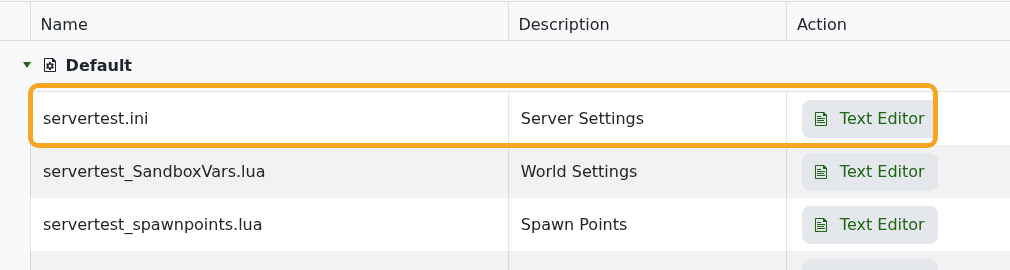
    Project Zomboid Configuration Files showing servertest.ini

  5. Add the Workshop ID to WorkshopItems=.
  6. Add the Mod ID to Mods=.
  7. Add the map folder to Map=. Keep Muldraugh, KY at the end unless the map author says otherwise.

    Project Zomboid servertest.ini Mods and Map lines

  8. Click Save & Exit, then restart the server.

Example:

WorkshopItems=2881482488
Mods=FinneganMentalAsylum
Map=FinneganAsylum;Muldraugh, KY

If the server starts but the map is not available, check that the map folder name exactly matches the Workshop page. Map folder names are case-sensitive.

  • 0 Users Found This Useful
Was this answer helpful?

Related Articles

How to install mods on a Project Zomboid server

Project Zomboid Workshop mods need two values from the Steam Workshop page: the Workshop ID and...

Project Zomboid Admin Commands Guide

Project Zomboid admin commands can be run in-game by an admin account or from the server console....

Making yourself Admin on your Project Zomboid Server

Making yourself Admin on Your Project Zomboid Server This guide will walk you through the...

How to run Unstable B42 Multiplayer on your Project Zomboid Server

Project Zomboid Build 42 now includes multiplayer support. You can install it on your Project...

How to join a Project Zomboid server

You can join your Project Zomboid server by saving it as a favourite in the in-game multiplayer...