Dynmap gives your players a live browser map of the server. You can install it through the panel with its web port filled in, or upload the JAR and edit configuration.txt yourself.
Install it from the panel
On a supported release, the panel can install Dynmap and set its web port for you.
- Open your Minecraft server in the control panel, take a backup and stop it.
- Open Plugins, or Mods on a modded server. Keep Versions on Current version, search for Dynmap and click its install icon. Choose a release for your server software and Minecraft version.
- Leave Configure automatically ticked. Under Port, choose Assign a new port or an unused secondary allocation. Do not use your main Minecraft port or a port already used by another plugin.
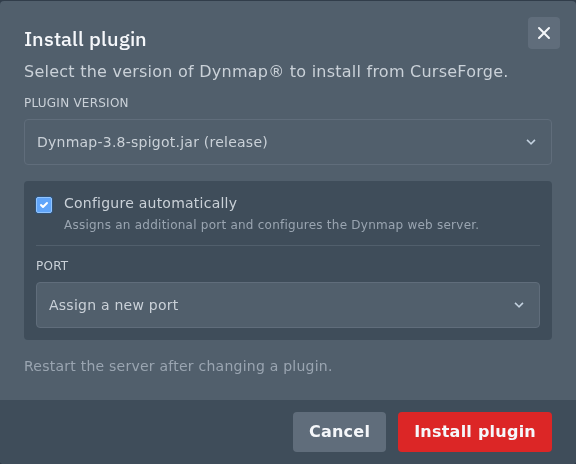
- Click Install plugin or Install mod. Once it finishes, start the server and use the web address described below.
If no suitable download or automatic configuration option is offered, use the manual method below. On an installation tracked by the panel, the Change version icon beside its installed JAR opens the configuration options again.
Install Dynmap manually
- Stop the server and download a compatible Dynmap build from the official Dynmap project. Use the Spigot/Paper download for a plugin server, or the matching Fabric/Forge download for a modded server.
- Open Files in the panel and open
plugins. Drag the JAR into File Manager, or use SFTP to upload it to the same folder. For a Fabric or Forge build, put the JAR inmodsinstead. Start the server once to create the config, then stop it. - Open Network and create an extra allocation in Network. Keep it separate from your game port and any other plugin ports.
- Open Files and edit
plugins/dynmap/configuration.txt. A mod installation normally usesdynmap/configuration.txtin the server's main folder instead. - Find
webserver-portand change it to your allocated port. Keep the built-in web server enabled. These are extracts from the file, using an example portwebserver-port: 25559 disable-webserver: false
Save the file and start the server. Keep all its other settings.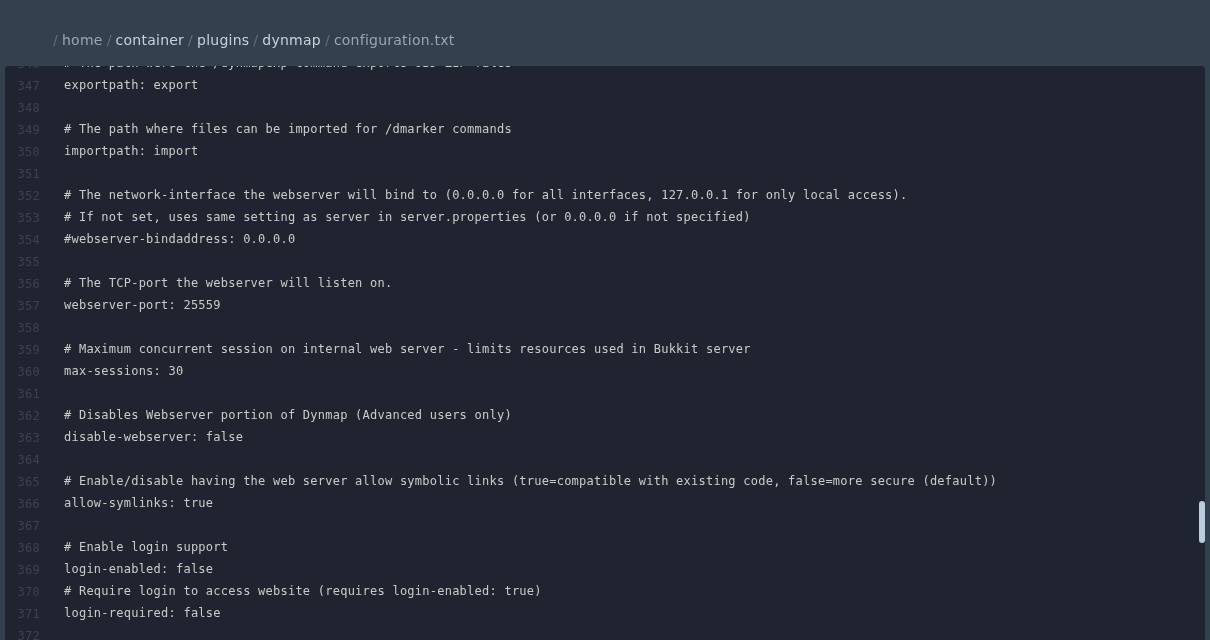
View and render the map
Open http://YOUR_SERVER_IP:YOUR_DYNMAP_PORT/. Use the extra port you assigned to Dynmap, rather than the one players use to join Minecraft.
For an existing world, you can ask Dynmap to render it from the console. Replace world with the actual world name.
dynmap fullrender worldUse /dynmap fullrender world in game if you have permission. A full render can use a lot of CPU and disk space on a large world, so run it when fewer people are playing. It renders existing chunks; it doesn't generate the unexplored parts of your world.
