Pl3xMap creates a browser map using Minecraft's map colours. The manual setup below works by uploading the JAR and assigning a separate port to its built-in web server.
Install it from the panel
On a supported release, the panel can install Pl3xMap and set its web port for you.
- Open your Minecraft server in the control panel, take a backup and stop it.
- Open Plugins, or Mods on a modded server. Keep Versions on Current version, search for Pl3xMap and click its install icon. Choose a release for your server software and Minecraft version.
- Leave Configure automatically ticked. Under Port, choose Assign a new port or an unused secondary allocation. Do not use your main Minecraft port or a port already used by another plugin.
- Click Install plugin or Install mod. Once it finishes, start the server and use the web address described below.
If no suitable download or automatic configuration option is offered, use the manual method below. On an installation tracked by the panel, the Change version icon beside its installed JAR opens the configuration options again.
Some Pl3xMap releases use one download for several platforms. On Paper, if the installer lists Fabric API as required and reports that it cannot find a compatible version, use the manual upload below. Fabric API is a dependency for Fabric servers, so don't add it to a Paper server's plugins folder.
Upload and configure Pl3xMap manually
- Download a release that supports your Minecraft version and server software from Pl3xMap on Modrinth.
- Stop the server and open Files in the panel and open
plugins. Drag the JAR into File Manager, or use SFTP to upload it to the same folder. For a supported Fabric, Quilt or Forge build, usemodsand include the dependencies for that loader.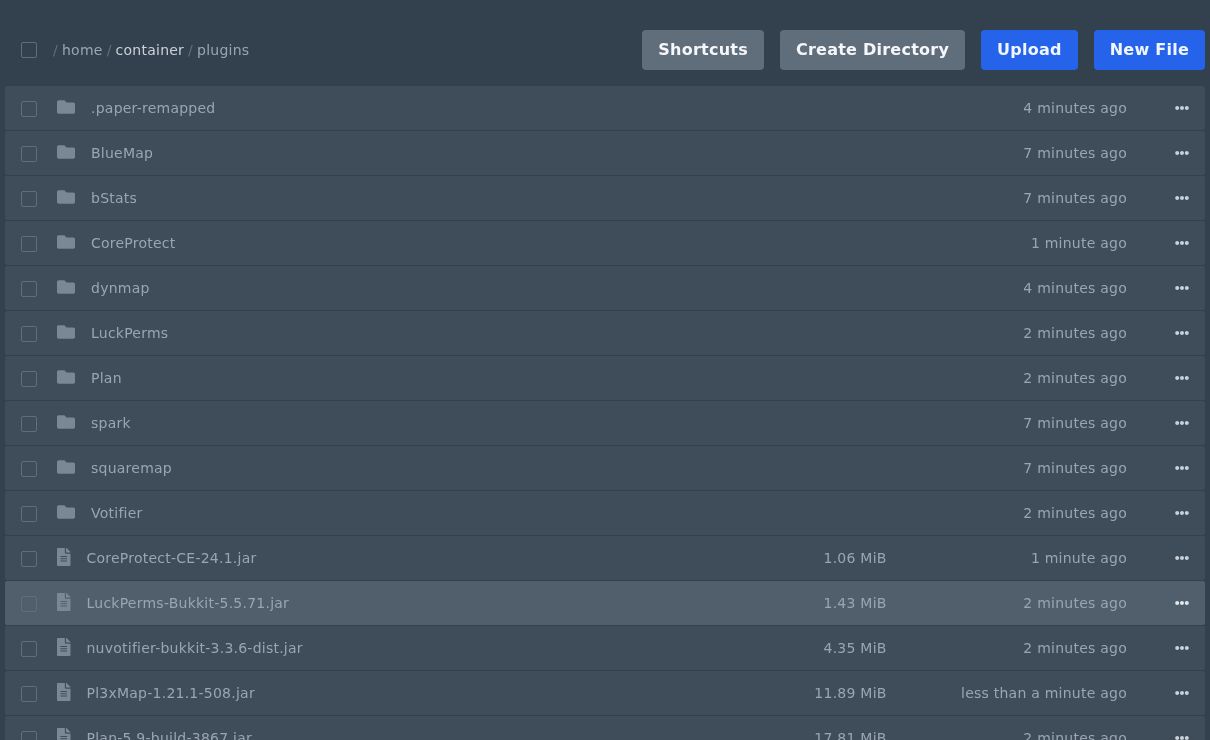
- Start the server once, let Pl3xMap create its files, then stop it. Open Network and create an extra allocation in Network for the map and note the port number.
- Open
plugins/Pl3xMap/config.ymlin Files. Mod builds useconfig/pl3xmap/config.ymlinstead. - Under
settingsandinternal-webserver, set the following values. Replace25599with your own allocated port.settings: internal-webserver: enabled: true bind: 0.0.0.0 port: 25599
Keep the rest of the config file, save it and start the server.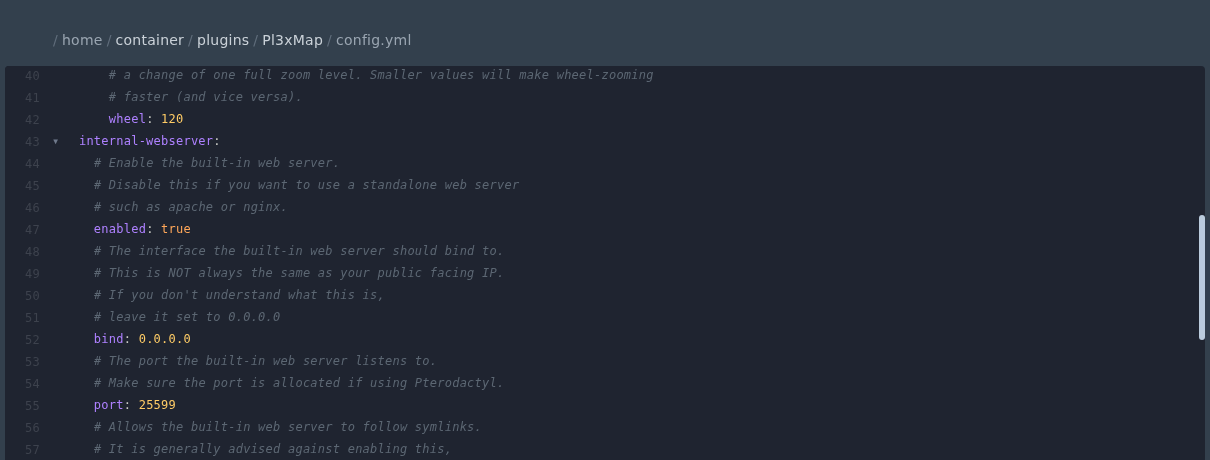
Open http://YOUR_SERVER_IP:YOUR_PL3XMAP_PORT/ in your browser. For an existing world, run /map fullrender world in game, replacing world with its name. In the console, leave off the opening slash. Use /map status to check the render. A large render takes time and uses server resources, so avoid starting several at once.
