Plan records player activity and server performance and displays it in a web dashboard. The panel installer can set the dashboard port for you. Web accounts and HTTPS still need to be set up separately.
Install it from the panel
On a supported release, the panel can install Plan and set its web port for you.
- Open your Minecraft server in the control panel, take a backup and stop it.
- Open Plugins, or Mods on a modded server. Keep Versions on Current version, search for Plan and click its install icon. Choose a release for your server software and Minecraft version.
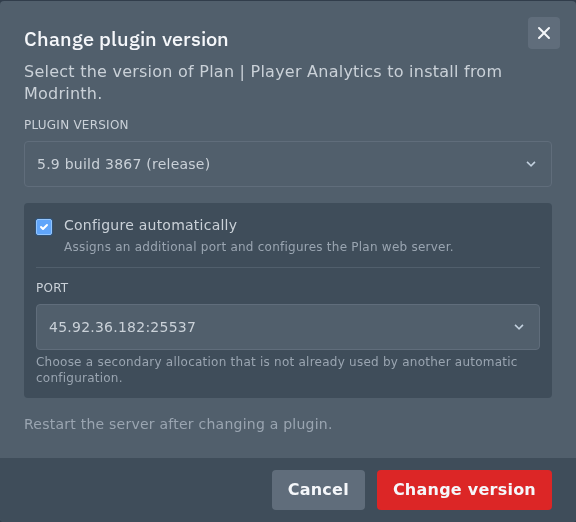
- Leave Configure automatically ticked. Under Port, choose Assign a new port or an unused secondary allocation. Do not use your main Minecraft port or a port already used by another plugin.
- Click Install plugin or Install mod. Once it finishes, start the server and use the web address described below.
If no suitable download or automatic configuration option is offered, use the manual method below. On an installation tracked by the panel, the Change version icon beside its installed JAR opens the configuration options again.
Install and configure Plan manually
- Stop the server and download the build for your software from Plan's official releases.
- Open Files in the panel and open
plugins. Drag the JAR into File Manager, or use SFTP to upload it to the same folder. For a Fabric build, usemodsand install the required dependencies. Start the server once, then stop it so you can edit its generated config. - Open Network and create an extra allocation in Network for Plan's web dashboard.
- In Files, edit
plugins/Plan/config.yml. A mod installation usesconfig/plan/config.ymlinstead. Find the existingWebserversection, enable the web server and set its port to your extra allocation. For exampleWebserver: Port: 25537 Disable_Webserver: false
Preserve the other values in that section and the rest of the file, then save and start the server.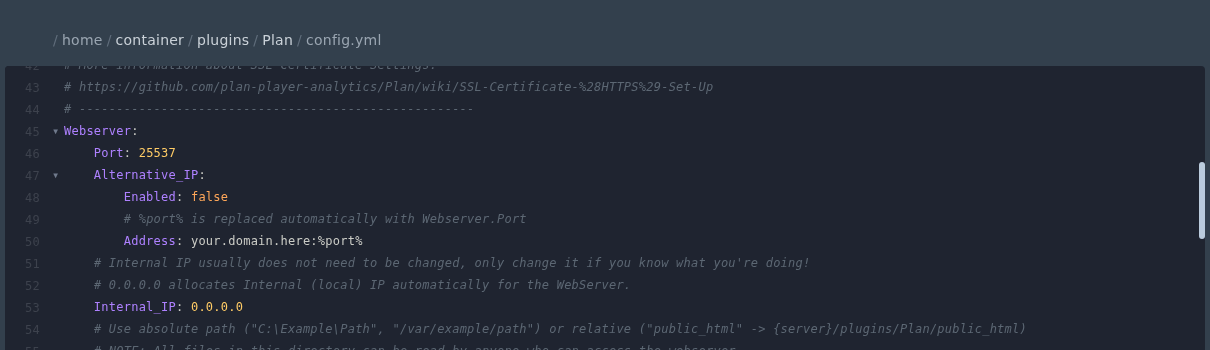
Open the dashboard
Run plan info in the console, or /plan info in game. Check the console for the web server starting, then open http://YOUR_SERVER_IP:YOUR_PLAN_PORT/. Plan needs players to join and some time to collect data before the dashboard becomes useful.
Plan's web login needs HTTPS. Adding a port in the panel doesn't provide a certificate or enable authentication. Follow Plan's HTTPS setup before opening access to private analytics. Once HTTPS is configured, use the registration page or the /plan register link offered by your installed version. Don't disable authentication just to get past a login error.
