CoreProtect logs block changes so you can inspect who changed an area and roll back damage. It starts recording after you install it; it can't recover a history of changes made before then.
Install it with the panel
- Take a backup and stop the server. CoreProtect's plugin needs compatible software such as Paper or Spigot.
- Open Plugins, keep Versions on Current version and search for CoreProtect. Choose a compatible release. Some provider downloads are restricted, so use the manual method if the panel can't obtain that release.
- If Configure automatically is available, leave it ticked and choose Local storage or Managed database. Local storage uses SQLite in the server files. Managed database uses the database already associated with this installation, otherwise an existing server database, or creates one when your limit and permissions allow it.
- Click Install plugin and start the server. On a tracked installation, the Change version icon reopens the storage options shown below.
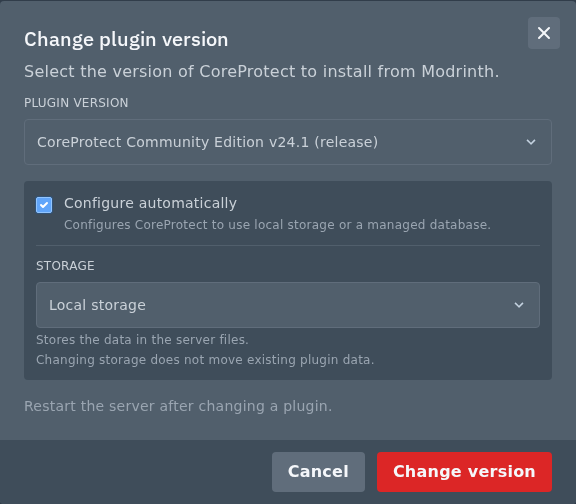
Changing the storage choice does not copy existing CoreProtect records. Back up the current data and follow CoreProtect's storage and migration guidance before changing a server that already has block history.
Upload CoreProtect yourself
- Download the compatible release from CoreProtect's official project. With the server stopped, open Files in the panel and open
plugins. Drag the JAR into File Manager, or use SFTP to upload it to the same folder. Replace an older CoreProtect JAR rather than leaving two versions installed. - Start the server once to generate
plugins/CoreProtect/config.yml, then stop it. Open that file through Files. - For local storage, keep the generated embedded database settings. Current CoreProtect 25+ releases default to DuckDB; older builds commonly use SQLite. To match the panel's Local storage option, set SQLite explicitly
database-type: sqlite
use-mysql: false
An embedded database doesn't need a database created in the panel.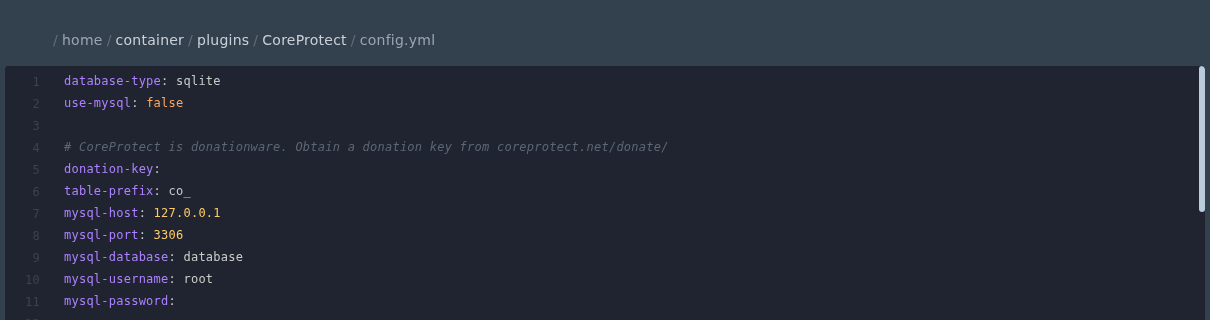
- For MySQL instead, create a database from the panel, open its connection details and put those values into the existing config entries. Replace every example value below with your own details, including the database port. Keep the password private.
The database host is the one shown under Databases, which may be different from your Minecraft IP. On older releases,database-type: mysql use-mysql: true mysql-host: 'YOUR_DATABASE_HOST' mysql-port: 3306 mysql-database: 'YOUR_DATABASE_NAME' mysql-username: 'YOUR_DATABASE_USERNAME' mysql-password: 'YOUR_DATABASE_PASSWORD'use-mysqlcontrols the choice. On newer releases,database-typetakes precedence. - Save the file and start the server. Check the console for CoreProtect loading and connecting to its selected storage.
Run co status in the console, or /co status in game as an operator. Use /co inspect to inspect recorded block changes. Installing CoreProtect does not claim land or stop players changing blocks; it records the actions it is configured to log.
