LuckPerms manages permission groups and the commands players can use. A single server can keep its permissions locally. A shared database is useful for a network, but linking several servers takes more than selecting the database option on one of them.
Use automatic configuration
- Back up the server and stop it. Open Plugins for Paper/Spigot-style software or a proxy, or Mods for a supported mod loader.
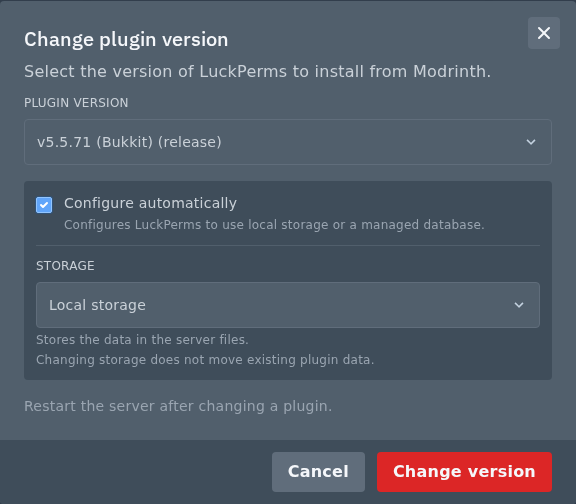
- Keep Versions on Current version, search for LuckPerms and choose a compatible release. When Configure automatically is offered, leave it ticked.
- Choose Local storage for an H2 database in the server files, or Managed database for MySQL. The panel reuses this installation's database first, otherwise an existing server database, and only creates one if needed and permitted. There isn't a database picker in this installer.
- Click Install plugin or Install mod, then start the server. For an installation tracked by the panel, you can reopen these choices through its Change version icon.
If no compatible download or automatic option is listed, use the manual method. Switching storage doesn't transfer existing permissions. Export and migrate them using LuckPerms' storage guidance before changing an established server.
Install and configure LuckPerms manually
- Choose your server platform on the official LuckPerms download page. A Bukkit/Paper JAR, Velocity JAR and Fabric JAR aren't interchangeable.
- With the server stopped, open Files in the panel and open
plugins. Drag the JAR into File Manager, or use SFTP to upload it to the same folder. Usemodsfor Fabric, Forge or NeoForge and install the dependencies required by that build. Start the server once, then stop it to edit the generated config. - For Paper, Spigot and Bukkit, open
plugins/LuckPerms/config.yml. Velocity usesplugins/luckperms/config.yml; modded and Sponge builds useconfig/luckperms/luckperms.conf. - For local H2 storage in a YAML config, keep this setting
storage-method: h2
For MySQL, create a database from the panel and copy its connection details into the existing
datasection. For example
Use the database host and port from Databases. Keep other entries in the file and replace each example value. A HOCONstorage-method: mysql data: address: 'YOUR_DATABASE_HOST:3306' database: 'YOUR_DATABASE_NAME' username: 'YOUR_DATABASE_USERNAME' password: 'YOUR_DATABASE_PASSWORD'.conffile uses different syntax
For local H2 in that file, usestorage-method = "mysql" data { address = "YOUR_DATABASE_HOST:3306" database = "YOUR_DATABASE_NAME" username = "YOUR_DATABASE_USERNAME" password = "YOUR_DATABASE_PASSWORD" }storage-method = "h2". - Save and start the server. Run
lp infoin the Bukkit/Paper console to confirm LuckPerms loaded with the expected storage. In game, use/lp info.
For permissions shared across several servers, follow LuckPerms' network installation guide. Each server needs the intended shared storage and messaging configuration. The panel's automatic setup only configures the server you're installing on.
