SSH keys let you log in to a Linux VPS without relying only on a password. They are safer for regular server administration and are useful when more than one admin needs access.
An SSH key has two parts: the private key stays on your own computer, and the public key is added to the VPS or VPS panel. Never upload or paste the private key into the panel.
Keep a working password or VPS console route until you have tested the key.
- Create a key on Linux, macOS, or Windows Terminal:
ssh-keygen -t ed25519
Press Enter to accept the default save location unless you already manage multiple keys. Use a passphrase if the key is stored on a shared computer.
- If you use PuTTY on Windows, create the key in PuTTYgen. Select EdDSA or RSA, click Generate, move the mouse until the key is created, then save the private
.ppkfile on your own computer. - Copy the public key only. With PuTTYgen, copy the public key from the box at the top. With
ssh-keygen, the public key is normally the file ending in.pub. - Open your VPS service from the client area.
- Open the VPS control panel.
- Click SSH Keys.
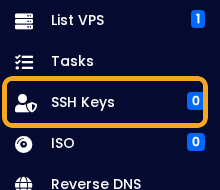
- Add the public key, give it a clear name, then save it.
- Use the key when connecting by SSH. Only disable password logins after confirming the key works.
If you generated a PuTTY .ppk key, use it in PuTTY under Connection > SSH > Auth > Credentials. OpenSSH keys can be used directly with Windows Terminal, Linux, macOS, and Termius.
For the SSH connection steps, use How to connect to a Linux VPS with SSH.
