Arma 3 multiplayer missions are usually uploaded as .pbo files into the MPMissions folder. After uploading the mission, add it to the class Missions block in server.cfg so the server knows what to load.

  1. Open your Arma 3 server in the control panel.
  2. Stop the server.
  3. Click File Manager.
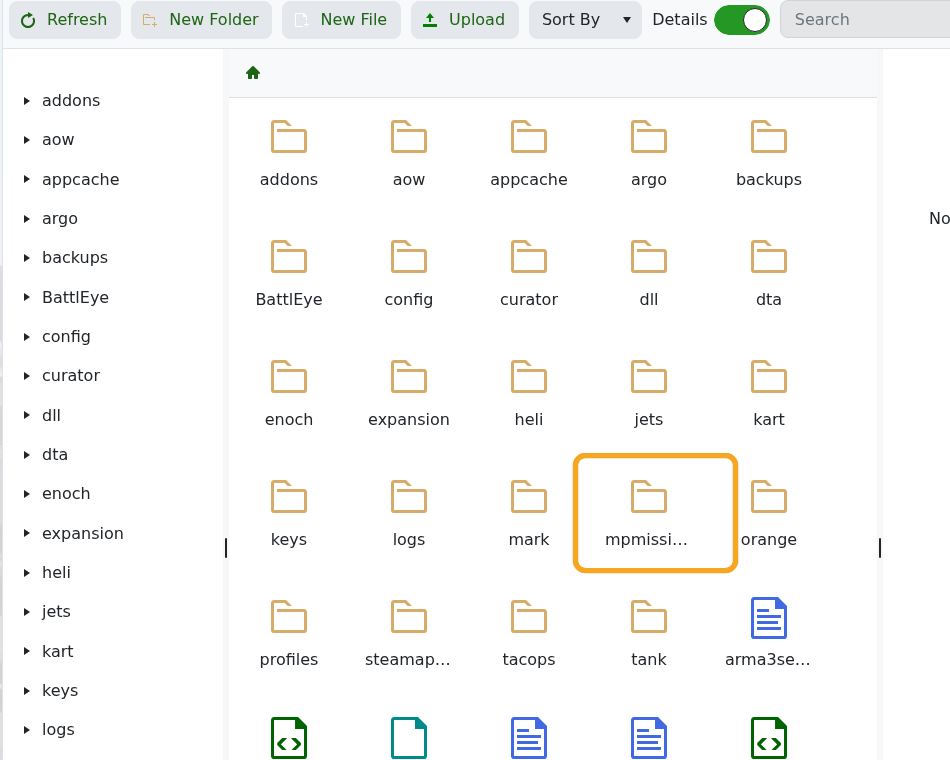
  4. Open the mpmissions folder. This is where Arma 3 multiplayer mission .pbo files are stored.

    Arma 3 File Manager showing the mpmissions folder and Upload button

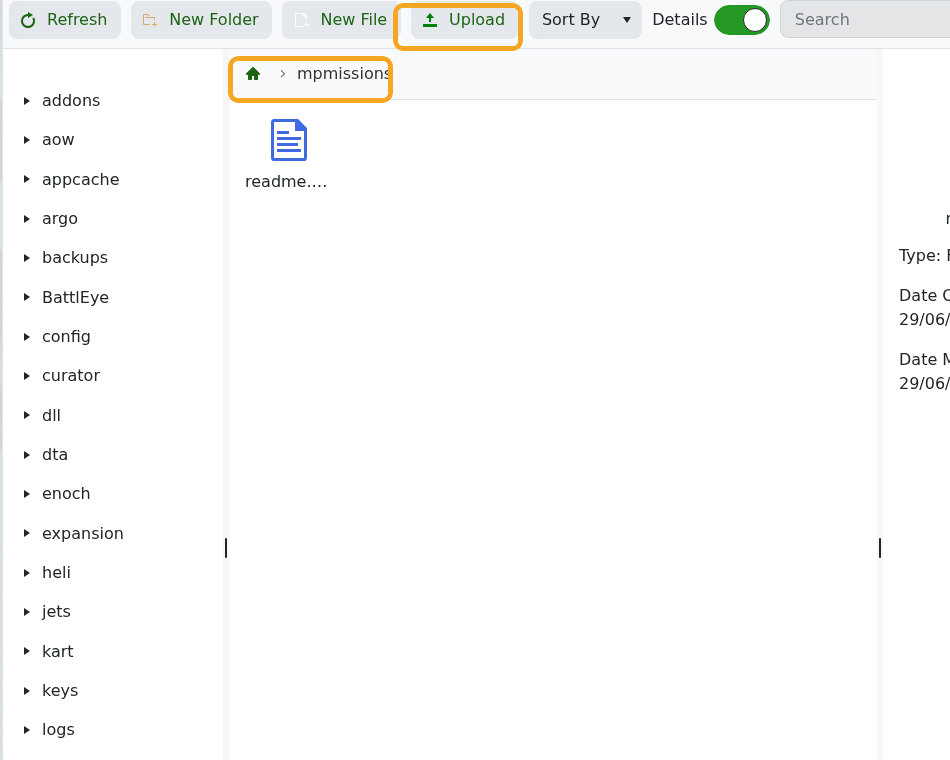
  5. Click Upload and upload your mission .pbo file.

    Arma 3 File Manager opened to the mpmissions folder

  6. Click Configuration Files.
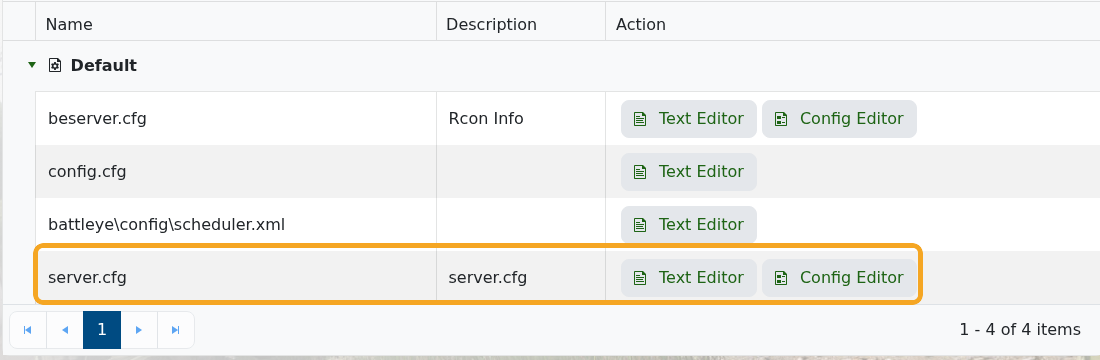
  7. Open server.cfg with Text Editor.

    Arma 3 Configuration Files showing server.cfg Text Editor

  8. Edit the class Missions block for your mission. Use Search or the expanded editor view if you need more space while editing the file.
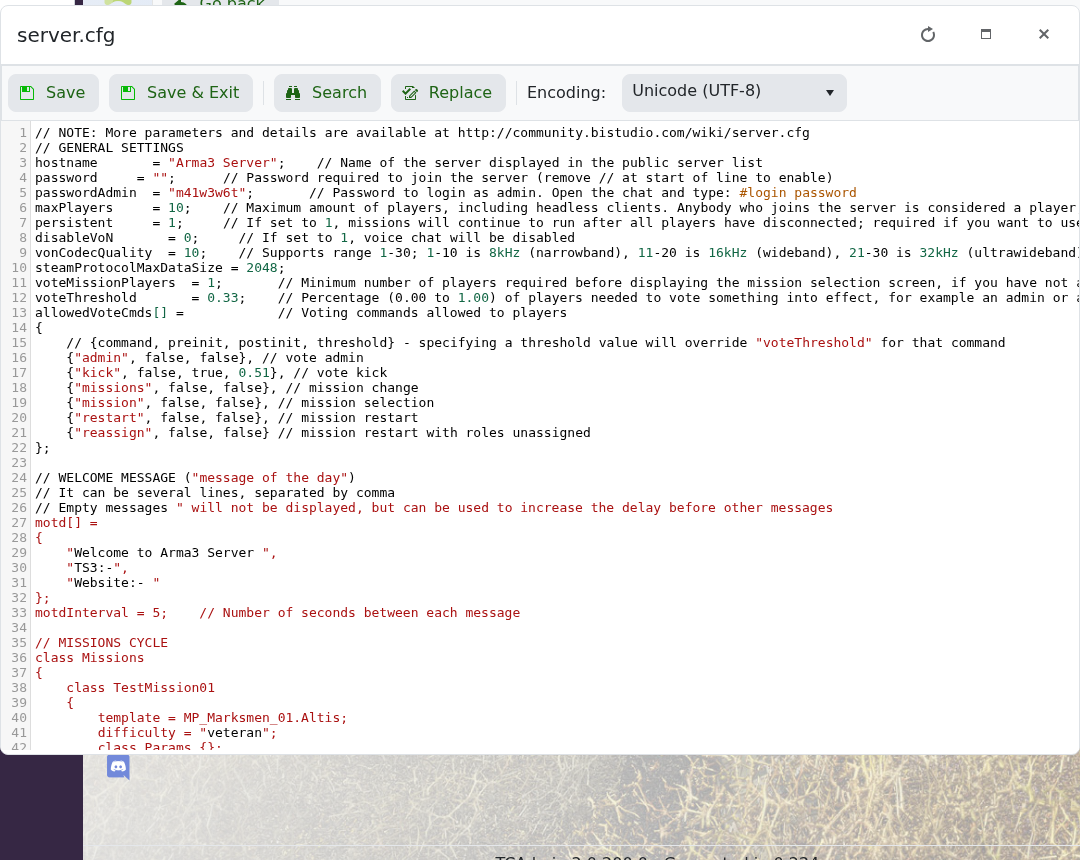
    Arma 3 server.cfg Text Editor showing the class Missions block

  9. Click Save & Exit, then start the server.

Example mission block:

class Missions
{
    class Mission1
    {
        template = "Mission1.Altis";
        difficulty = "Regular";
    };
};

Do not include .pbo in the template value. For example, a file named Mission1.Altis.pbo should normally use template = "Mission1.Altis";.

  • 19 Users Found This Useful
Was this answer helpful?

Related Articles

Installing workshop mods to your ARMA 3 server

Install Arma 3 Workshop mods from the control panel, then make sure the server command line loads...

ARMA3 Server mods not showing on game launcher

If Arma 3 launcher only shows some of your server mods, the server may not be sending enough mod...

How to add creator DLCs to an Arma3 server

To introduce the Arma 3 DLC SOGPF (Prairie Fire) onto your server, a few steps await your...

How to join an Arma 3 server

You can join your Arma 3 server by using the connection address from your control panel. Arma 3...

How to update your Arma 3 server

Use Steam Update when Arma 3 releases a dedicated server update or when your game client reports...