To upload a world to your 7 Days to Die server, you need to upload the save files and make sure the matching world folder is on the server.
Before changing any save files, stop your server. This stops the server from writing over the files while you are uploading them. We also recommend taking a backup before replacing or uploading save data.
Finding your world on your PC
- On your PC, open your 7 Days to Die saves folder. On Windows this is usually
%AppData%\7DaysToDie\Saves. - Open the folder for the world you want to upload. Inside it you should see the save folder for that world.
- If this is a Random Gen or custom generated world, also check
%AppData%\7DaysToDie\GeneratedWorlds.
If you are uploading Navezgane or one of the pregen worlds already on the server, you will normally only need the save folder. If you are uploading a custom generated world, you will need the save folder and the matching world folder.
Uploading the save folder
Make sure your server is still stopped before uploading the files.
Open your 7 Days to Die server in the control panel, click File Manager, then go to Data/AppData/Saves.
Use the File Manager on the control panel to upload your files. If you would prefer to use FTP, please see our How to connect to FTP guide.
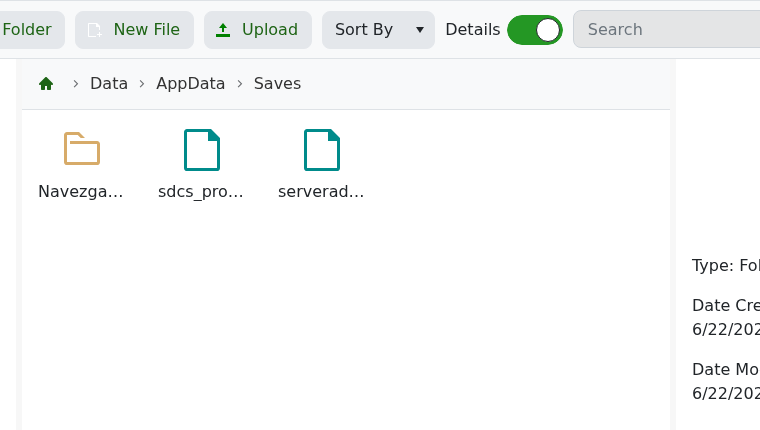
- Upload your save folder into the correct world folder. For example, a Navezgane save called MyServer would go in
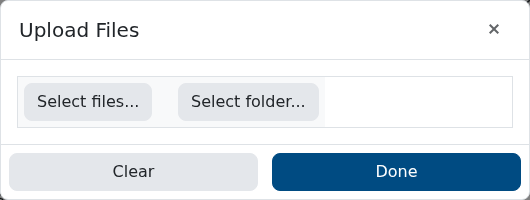
Data/AppData/Saves/Navezgane/MyServer. - Click Upload, then use Select files..., Select folder..., or drag and drop the folder into the upload window.
Uploading a custom world folder
If your save uses a custom generated world, go to Data/Worlds and upload the matching world folder there.

For example, if your local generated world is called MyGeneratedWorld, the folder should be uploaded as Data/Worlds/MyGeneratedWorld.
You do not normally need to upload anything here for Navezgane or the pregen maps already shown in Data/Worlds.
Setting the server to load your world
Go back to the control panel and open Configuration Files, then edit serverconfig.xml.
- Set GameWorld to the world folder name.
- Set GameName to the save folder name.
For example:
<property name="GameWorld" value="Navezgane"/>
<property name="GameName" value="MyServer"/>
Save the file, then start your server. If the world name and save name match the folders you uploaded, the server should load your uploaded world.
If the server starts a fresh world, check the folder names first. The most common cause is the save being one folder too deep, or GameWorld / GameName not matching the uploaded folders exactly.