Arma Reforger uses game.scenarioId in server_config.json to decide which scenario or mission loads when the server starts. The Config Editor includes the built-in scenario IDs you can copy into the Mission field.

  1. Open your Arma Reforger server in the control panel.
  2. Click Configuration Files.
  3. Open server_config.json with Config Editor.
  4. Copy one of the built-in mission values shown under the Mission field, or enter the scenario ID required by the scenario you are using.

    Arma Reforger Config Editor showing Mission field and built in scenarios

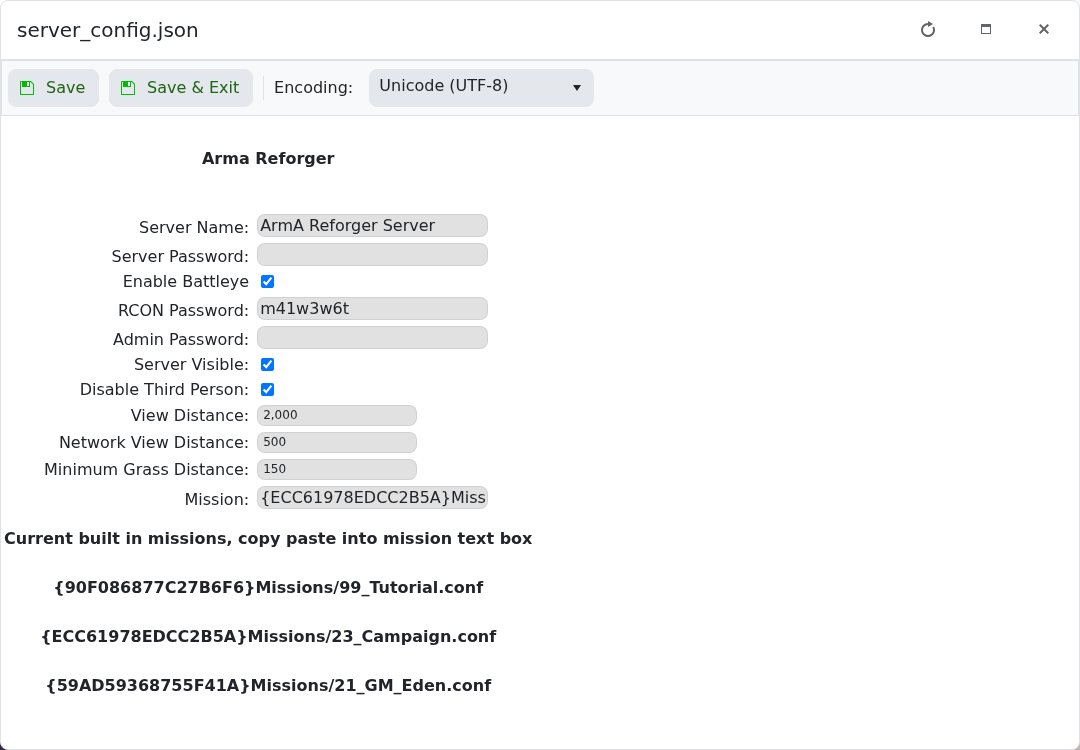
  5. Paste the scenario into Mission.
  6. Click Save & Exit, then restart the server.

Built-in examples shown by the panel include:

{90F086877C27B6F6}Missions/99_Tutorial.conf
{ECC61978EDCC2B5A}Missions/23_Campaign.conf
{59AD59368755F41A}Missions/21_GM_Eden.conf

If you use a modded scenario, install the required mod first and use the scenario path listed by the mod author.

  • 0 A felhasználók hasznosnak találták ezt
Hasznosnak találta ezt a választ?

Kapcsolódó cikkek

How to join an Arma Reforger server

You can join your Arma Reforger server by using the server address shown in your control panel....

How to update your Arma Reforger server

Use Steam Update when Arma Reforger releases a server update or when your client reports that the...

How to backup your Arma Reforger server

Create a backup before changing scenarios, editing server_config.json, adding mods, changing RCON...

How to restore a backup on your Arma Reforger server

Restore a backup when you need to roll back after a broken update, bad JSON edit, unwanted...

How to change your Arma Reforger server name and password

The Arma Reforger server name and password are stored in server_config.json. Use the Config...